Fun DIY Art Kits for Kids: How to Keep Your Children Busy, Creative, and Engaged All Day
Looking for ways to entertain your kids while fostering creativity? DIY art kits are the perfect solution! Whether you’re dealing with rainy days, weekends, or just need to fill a few hours, craft projects can keep your little ones engaged and learning. In this guide, we’ll explore how to make DIY art kits, what activities to include for different age groups, and how to keep your craft supplies organized. We’ll also offer tips on how to engage both younger kids and older children in fun, creative projects. At DIY Dalia’s, we believe in the power of crafting to inspire young minds—Innovate, Create, and Elevate!
Why Crafting is Great for Kids
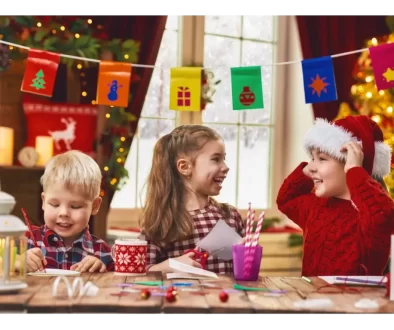
Crafting encourages creativity, improves fine motor skills, and can be an excellent activity to help kids unwind. Kids of all ages can benefit from working on DIY projects, from creating art kits to building crafts from household items. Plus, crafting together as a family can offer a great bonding experience. It’s time to “Upcycle Your World, One Project at a Time” and transform everyday moments into memorable experiences.
Materials You’ll Need for DIY Art Kits
Before getting started, gather the following materials based on your kids’ ages and interests:
- Craft paper (colored, patterned)
- Washable markers, crayons, and colored pencils
- Scissors (safety scissors for younger kids)
- Glue sticks and non-toxic glue
- Popsicle sticks, pipe cleaners, and googly eyes
- Beads, sequins, and glitter
- Construction paper and foam sheets
- Recycled household items (paper rolls, old magazines)
- Felt fabric and buttons
- Stamps, ink pads, and stickers
- Acrylic Paint
- Paper plates
- Paint, markers, or crayons
- Macramé cord or yarn (around 3 feet long, choose your favorite colors)
- Keychain ring (or a carabiner clip)
- Scissors
- Tape (optional) (to hold down your work while you knot)
- Beads or charms (optional, to add decoration)
Please Note: This post contains affiliate links, which means I may earn a commission if you make a purchase through these links. Your support helps keep this content free. Thank you for your understanding and support!
How to Make Your Own Art Kits for Kids
Creating an art kit for kids is easier than you might think! You can customize kits depending on their interests and age group. Here’s a breakdown by age:
For Ages 3-5: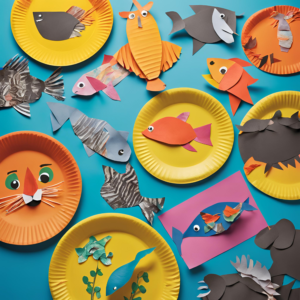
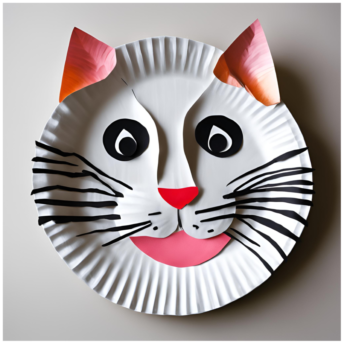
- Simple, supervised crafts like handprint art, coloring pages, or paper plate animals. Keep it easy and tactile.
- Use materials like pre-cut shapes, glue, and non-toxic paint.
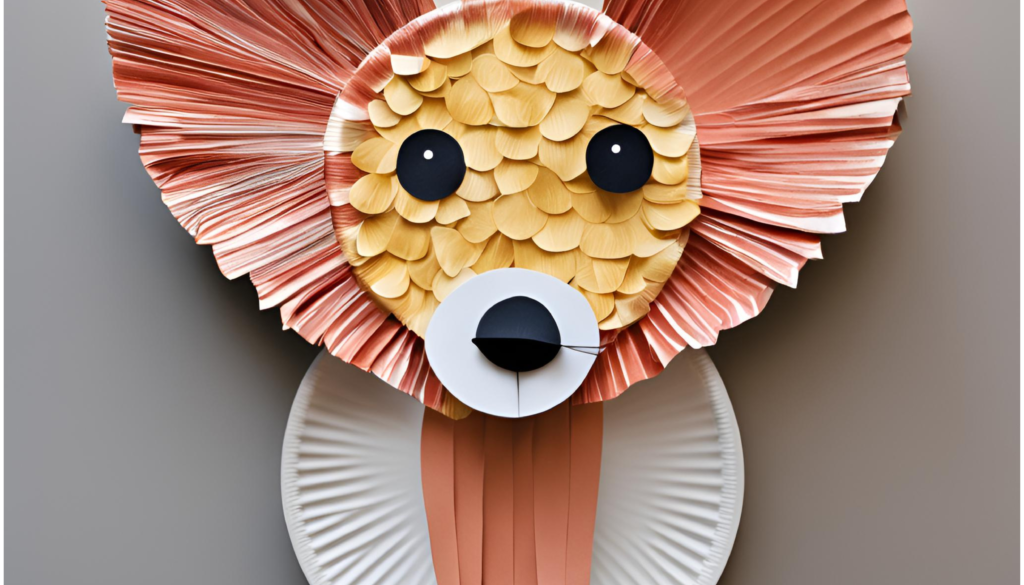
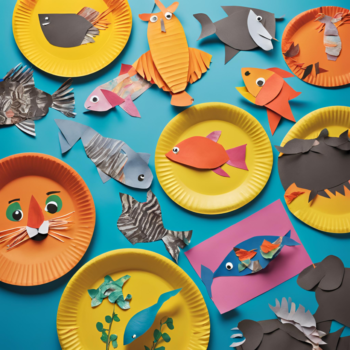
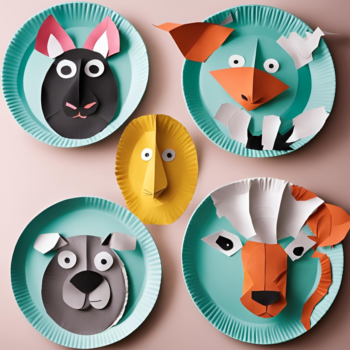
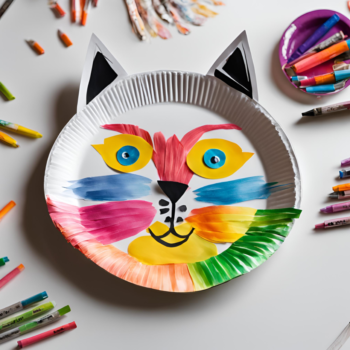
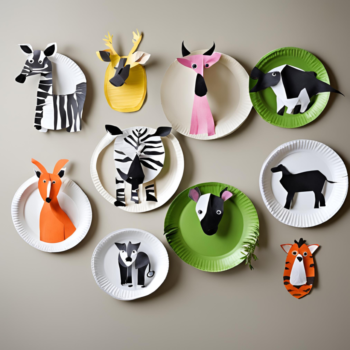
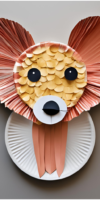
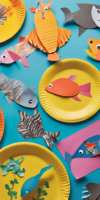
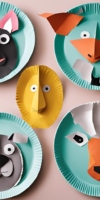
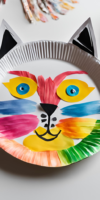
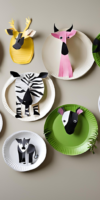
Paper Plate Animals Craft
Here’s a simple step-by-step guide to making paper plate animals, perfect for kids’ craft projects:
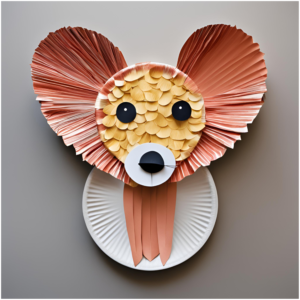 Steps:
- Choose Your Animal:
- Decide which animal you want to make, such as a lion, frog, elephant, fish, or bird. This will help you decide the color of the paper plate and the additional materials needed.
- Paint or Color the Paper Plate:
- Paint or color the paper plate according to the animal’s body. For example, use brown or orange for a lion, green for a frog, or blue for a fish. Let the plate dry if you’re using paint.
- Cut Out Animal Features:
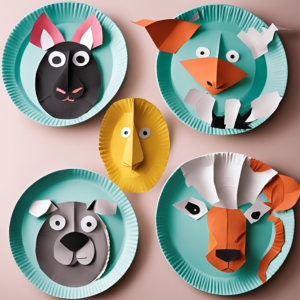
- Use construction paper to cut out the necessary features for your chosen animal:
- Ears (for animals like elephants or cats)
- Legs and Arms (for animals like frogs or bears)
- Wings (for birds)
- Tail (for animals like monkeys or lions)
- Fins (for fish)
- Attach the Features:
- Once you’ve cut out the features, glue them onto the paper plate:
- Ears should be glued to the top or sides.
- Legs and arms can be glued to the bottom or sides.
- Wings should be attached to the sides if you’re making a bird.
- Fins go on the side or back of the plate for a fish.
- Add the Face:
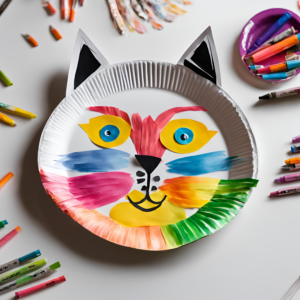
- Eyes: Glue googly eyes onto the plate, or cut out circles from construction paper and draw the pupils.
- Mouth and Nose: Draw or cut out a mouth and nose with construction paper. For animals like lions or bears, you can use pom-poms for the nose.
- Whiskers: Use small strips of paper or pipe cleaners for whiskers if you’re making animals like a cat or lion.
- Optional Additions:
- Mane (Lion): For a lion, you can glue orange or yellow strips of paper around the edge of the plate to create a mane. You can also use yarn or tissue paper for a more textured look.
- Tail (Monkey or Cat): Attach a pipe cleaner or cut a tail from construction paper and glue it to the back.
- Feathers (Bird): Use craft feathers to give your bird a colorful and fluffy appearance.
- Let Everything Dry:
- Allow the glue to dry completely before moving or playing with your paper plate animal.
Ideas for Different Animals: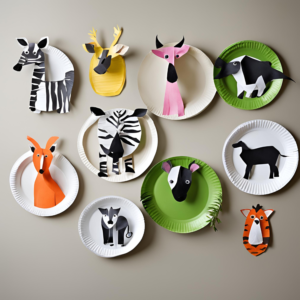
- Lion: Use orange paper strips for the mane, draw on a big nose and whiskers.
- Frog: Paint the plate green, add long legs cut from construction paper, and glue googly eyes at the top.
- Elephant: Add large ears and a long trunk made from construction paper.
- Fish: Use bright colors for the fish scales, add fins, and a tail with construction paper or shiny materials.
Enjoy Your Creation:
You can hang your paper plate animals on the wall, use them as decorations, or create a zoo with different animals!
For Ages 6-8:
- Craft kits that include items like beads for making jewelry, pipe cleaners for creating animal figures, and sticker art.
- Encourage kids to build something more elaborate with basic instructions, helping them follow step-by-step tasks.
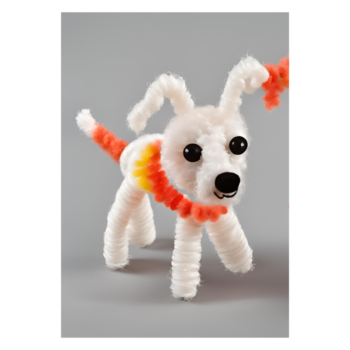
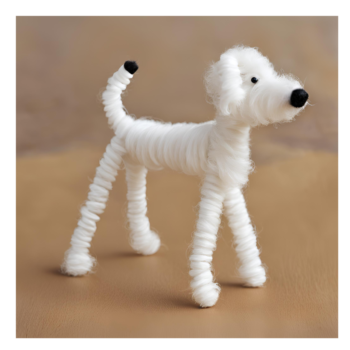
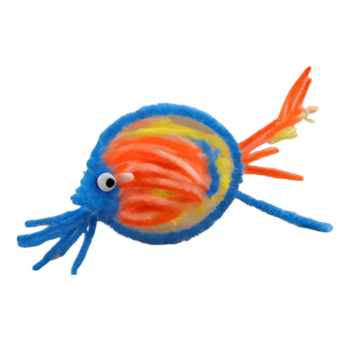
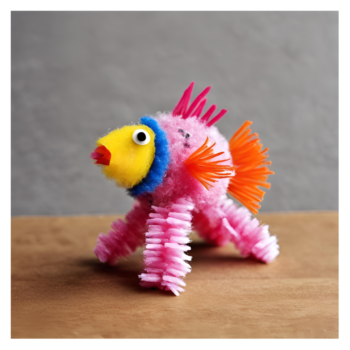
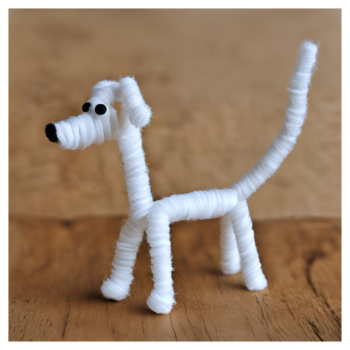
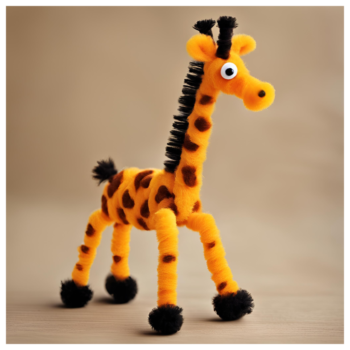
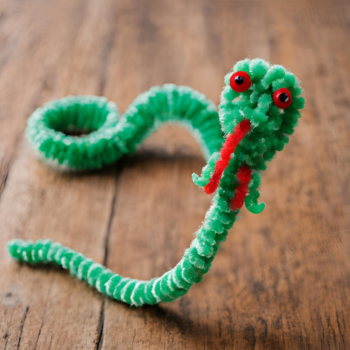
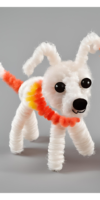
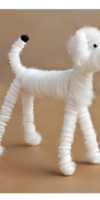
Guide for Kids: How to Make Animal Figures with Pipe Cleaners
Making animal figures using pipe cleaners is a fun and easy craft that lets your imagination run wild! You can create anything from tiny bugs to large animals with just a few materials. Here’s how you can make some basic animal shapes.
Basic Steps for Making Pipe Cleaner Animals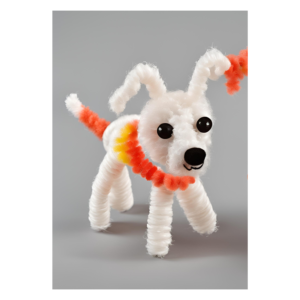
- Choose Your Animal:
- Decide what animal you want to make. Different animals might need different numbers and colors of pipe cleaners.
- Start with the Body:
- Twist two pipe cleaners together: To form the main body, take two pipe cleaners of the same or different colors and twist them together in the middle. This creates the animal’s body.
- Shape the body: Bend the twisted pipe cleaners into an oval or circular shape for animals like a cat, dog, or bug.
- Make the Head:
- Create a small loop: For the head, take another pipe cleaner and roll it into a small circle or oval.
- Attach the head: Use a small piece of another pipe cleaner or twist the end of the head loop onto the body you made in Step 2.
- Add Legs, Arms, or Fins:
- Legs and arms: Cut pipe cleaners into small pieces (about 2-3 inches long) to create legs and arms. For four-legged animals (like a dog or giraffe), twist two pieces of pipe cleaner around the body on each side.
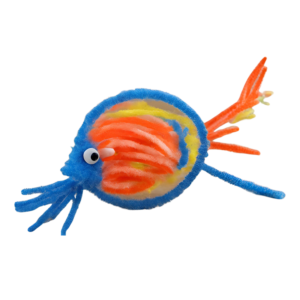
- Fins (for fish): If you’re making a fish, create two fin shapes from short pipe cleaner pieces and twist them onto the sides.
- Make the Tail:
- Bend and attach a tail: For animals like cats, dogs, or monkeys, cut a piece of pipe cleaner and bend it to look like a tail. Attach it to the back of the body by twisting the end of the tail around the body.
- Add Eyes and Other Features:
- Googly eyes: Glue googly eyes onto the head. If you don’t have googly eyes, you can make eyes from small pieces of pipe cleaners or draw them with markers.
- Nose and mouth: Create small details like noses or mouths using tiny pieces of pipe cleaners or markers.
- Ears or horns: For animals like bunnies or deer, twist small pieces of pipe cleaner into ear or horn shapes and attach them to the head.
- Decorate:
- Add pom-poms: Glue small pom-poms onto the head to create noses, or glue them to the body for extra texture.
- Use beads: You can thread beads onto the legs, arms, or body to add a bit of sparkle and detail.
- Shape and Adjust:
- Bend into shape: Bend the arms, legs, and body into the right shape to bring your animal to life. Pipe cleaners are flexible, so you can adjust the legs to make the animal stand or pose the arms however you like.
- Add final touches: Use markers to draw any extra details like stripes, spots, or whiskers.
Animal Ideas:
Here are some examples of how you can make specific animals with pipe cleaners:
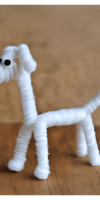
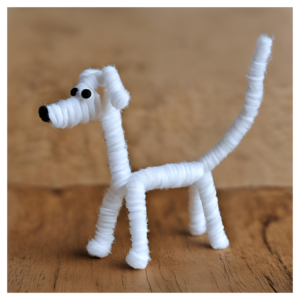
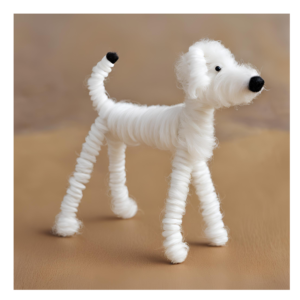
- Dog:
- Body: Twist two pipe cleaners into an oval shape for the body.
- Head: Make a small loop for the head and twist it onto the body.
- Legs: Add four short pieces for legs.
- Tail: Attach a short tail to the back.
- Butterfly:
- Body: Twist two pipe cleaners together to form a straight line for the body.
- Wings: Bend four loops of pipe cleaners to form the wings and attach them to the body.
- Antennae: Attach two small pipe cleaners on the head for the antennae.
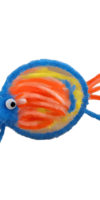
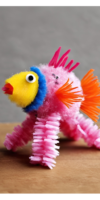
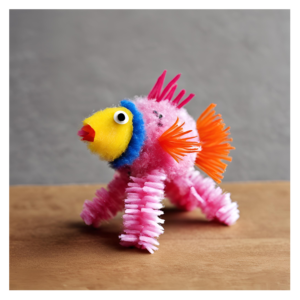
- Fish:
- Body: Twist two pipe cleaners into a circular shape for the body.
- Fins: Use smaller pieces to create fins and a tail.
- Eyes: Add googly eyes or draw eyes with markers.
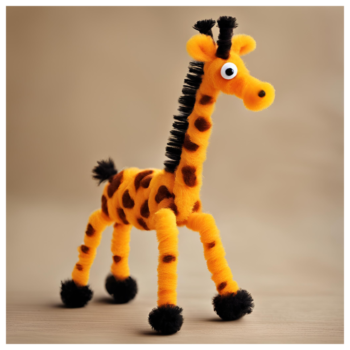
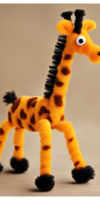
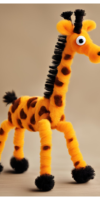
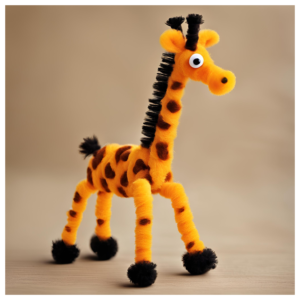
- Giraffe:
- Body: Twist two long pipe cleaners together to create a long neck and body.
- Head: Make a small loop for the head and attach it to the top of the neck.
- Legs: Use four pieces for long legs, and bend them to stand up.
- Tail: Add a small tail at the back.
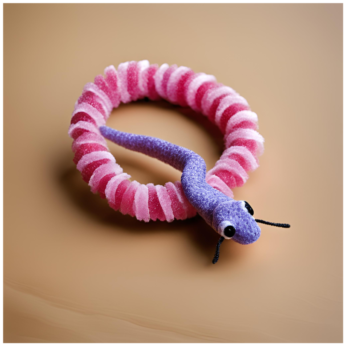
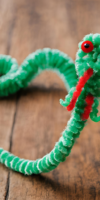
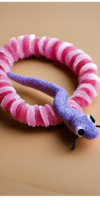
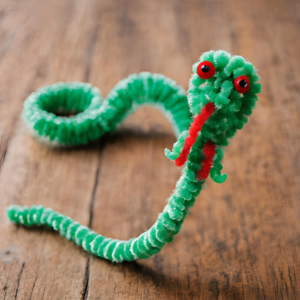
- Snake:
- Body: Twist one long pipe cleaner into a wavy shape.
- Head: Curl one end into a small circle for the head.
- Tongue: Attach a small red pipe cleaner as the tongue.
Tips for Crafting Pipe Cleaner Animals:
- Mix and match colors: Use multiple colors to make your animal more colorful and fun.
- Be creative with details: Add fun details like stripes, spots, or even wings using different materials like construction paper or felt.
- Have fun: The best part about pipe cleaner animals is that you can make any animal you like and customize it however you want!
For Ages 9-12:
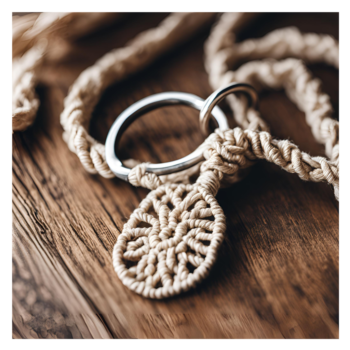
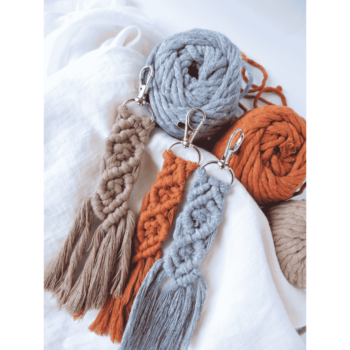
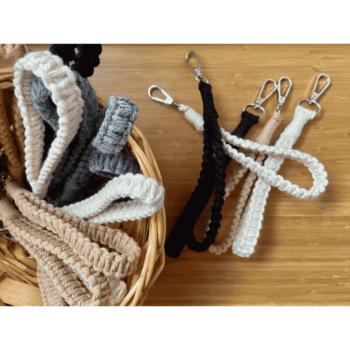
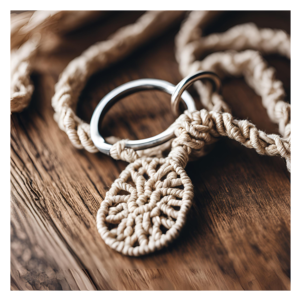
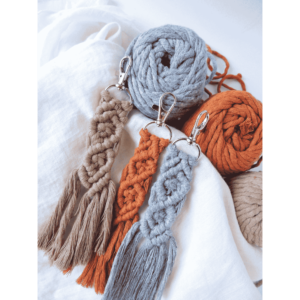
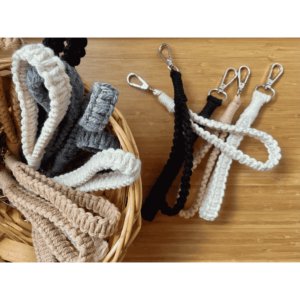
- More advanced projects like macramé keychains, painting wooden figurines, or building birdhouses from scratch.
- Introduce tools like craft knives (under supervision), and more challenging design-based projects.
Craft kits are versatile, and you can adjust the complexity based on your child’s abilities. These kits are perfect for birthdays, rainy days, or as educational activities.
Step-by-Step Guide: How to Make Macramé Keychains for Kids (Ages 9-12)
Making a macramé keychain is a fun and creative activity! With just a few knots and some colorful cord, you can create a stylish keychain to hang on your backpack, keys, or give as a gift. Follow this step-by-step guide, and you’ll have your own macramé keychain in no time.
Step 1: Cut Your Cord
- Cut two pieces of macramé cord, each about 24 inches long. If you want a longer keychain, cut the cords longer.
- Cut a third piece of cord about 10 inches long (for the loop at the top).
Step 2: Attach the Cord to the Keychain Ring
- Fold one of your long cords in half to find the center.
- Place the looped end through the keychain ring.
- Pull the two loose ends of the cord through the loop to make a lark’s head knot.
- Repeat with the second long cord. You should now have four loose ends hanging down from the keychain ring.
Step 3: Secure Your Work
- You can tape the keychain ring to the edge of a table or a clipboard to keep it steady while you work.
Step 4: Start Making Knots (Square Knot)
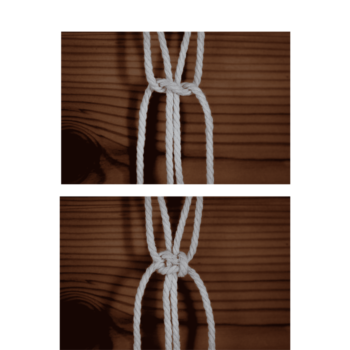
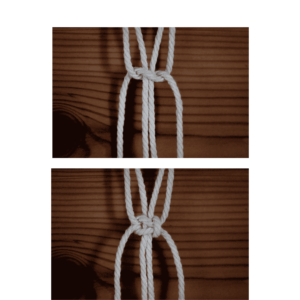
**To make the keychain, you’ll use a basic macramé knot called a Square Knot.
Here’s how to do it:
- Separate the four cords hanging down into two groups: the outer cords and the middle cords (two in the center).
- Take the left outer cord and bring it over the middle two cords, and under the right outer cord.
- Take the right outer cord, bring it under the middle cords, and through the loop made by the left cord. Pull it tight.
- Repeat the steps but start with the right cord going over the middle two cords and the left cord going under. Pull tight.
Now you’ve completed one square knot!
Step 5: Continue Knotting
- Keep repeating the Square Knot pattern, alternating between starting with the left and right cords. This will create a neat, woven pattern down the cords.
- Make about 6-8 square knots (or more, depending on how long you want the keychain to be).
Step 6: Add Beads or Charms (Optional)
- If you want to add some extra decoration, slide a bead onto the middle two cords between knots.
- Then continue with the square knot pattern to secure the bead in place.
Step 7: Finish the Keychain
- When your keychain is the length you like, tie a simple knot at the bottom with all four cords to keep everything in place.
- If you want to add a tassel at the end, leave the cords long and trim them to your desired length. If not, cut the cords close to the final knot.
- You can also add beads to the tassel if you want some extra flair.
Step 8: Trim and Tidy Up
- Trim any extra cord at the bottom if needed to make it look neat.
- You can also use a small dab of glue on the final knot if you’re worried it will come undone, but it’s usually not necessary.
Step 9: Attach Your Keychain
- Now that your macramé keychain is complete, you can attach it to your keys, backpack, or anywhere you want!
- Try using different colors for the cords to make a multicolored keychain.
- Experiment with adding more beads or charms to personalize your design.
- If you get comfortable with the square knot, you can learn other macramé knots like the half hitch to make more complex patterns.
Recap of the Knots:
- Lark’s Head Knot: Used to attach the cord to the keychain ring.
- Square Knot: The main knot used to create the woven design.
Final Thoughts:
With these simple steps, you can create your very own stylish macramé keychain! Once you master the square knot, you can try different patterns and knots to make even more creative macramé projects. Have fun and get creative!
How Do You Entertain Kids All Day?
It’s a question every parent asks, especially when school is out and the kids are bouncing off the walls. Arts and crafts are a fantastic solution. With the right setup, you can create a day full of fun. Break down the day into several creative sessions, including:
- Morning Art Time:
Start the day with simple coloring or sticker projects. Kids can warm up by designing their own superhero capes or coloring in pre-made templates. - Afternoon Craft Projects:
Shift into more involved DIY activities like building with popsicle sticks or creating personalized bookmarks. Keep the supplies handy and set up a dedicated crafting space for the day. - Evening Show-and-Tell:
Wrap up the day with a show-and-tell where your kids can present their creations. It helps build confidence and allows you to celebrate their efforts!
What Can I Make with a Craft Kit?
The possibilities are endless! Depending on what materials you include, here are some ideas for what kids can make:
- Custom Jewelry: Use beads, thread, and clasps to make bracelets or necklaces.
- DIY Picture Frames: Personalize wooden or cardboard frames using paint, stickers, and glitter.
- Paper Plate Crafts: Turn simple plates into masks, animals, or even 3D models.
- Rock Painting: Collect stones and paint them with designs or patterns for an outdoor activity.
These ideas not only keep kids entertained, but they also help improve their focus and creativity.
Organizing and Decluttering Craft Supplies
One challenge of crafting with kids is keeping the supplies organized. Here are some tips to help declutter your crafting space:
- Label Bins: Use plastic bins or containers for different supplies like glue, paint, or stickers. Label each one clearly so kids can help with clean-up.
- Create a Craft Station: Dedicate a small corner of the house where art supplies are neatly arranged, ensuring easy access.
- Rotate Supplies: To prevent boredom, rotate craft materials every few weeks. This keeps things fresh and avoids overwhelming your kids with too many options.
DIY for Kids: Teach Them the Joy of Creating
Teaching kids DIY skills isn’t just about keeping them busy—it’s about empowering them to use their imagination and hands to build something new. Here are some simple DIY projects for various ages:
For 3-Year-Olds:
- Simple collages using colored paper and stickers.
- Sensory activities like finger painting.
For 6-Year-Olds:
- Projects like paper-mâché animals or easy-to-make origami.
- Craft kits that include step-by-step instructions for painting and creating.
For 10-Year-Olds:
- More advanced DIY activities like making friendship bracelets, designing clay models, or working with wood and hammers to build small projects.
Engaging Your Kids at Home
Wondering how to keep a 10-year-old busy or how to engage a 6-year-old at home? Crafts are the perfect answer. Here are some ideas for activities:
- Interactive Projects: Set up tasks that require problem-solving, like building a model or sewing a small pouch.
- Outdoor Crafts: Collect items from nature (like leaves, flowers, or rocks) and use them for nature-inspired art.
- Household Item Crafts: Repurpose toilet paper rolls, cereal boxes, and bottle caps into creative sculptures or useful items like pencil holders.
Not only are these activities fun, but they also foster a sense of accomplishment.
Conclusion
Crafting offers an excellent way to keep kids entertained, educated, and inspired. From simple DIY kits for younger children to more advanced projects for older kids, there’s something for everyone. At DIYDalia’s, we’re here to help you Innovate, Create, and Elevate every step of the way. By incorporating art and craft kits into your daily routine, you can provide your children with fun, educational activities that also build confidence and creativity.
Remember, “Upcycle Your World, One Project at a Time” and make every moment at home a chance to create something beautiful!

